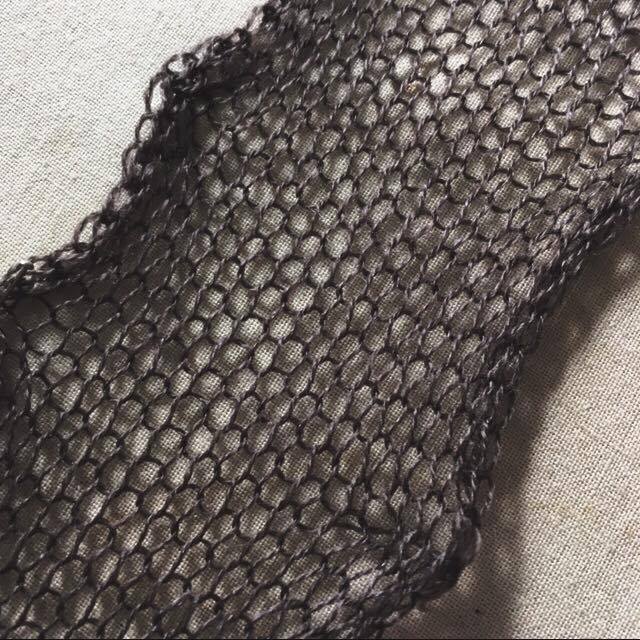
Textiles is also a good media to use due to it's stereotype. Most people connect knitting to the elderly and because of this you can be very daring.
 |
| Chunky Knitting Machine |
 |
| Chunky Knitting Machine |
There are two types of knitting machines, this one which is a chunky and standard. Chunky is used for thicker yarn (3 needles per inch) and standard for thinner yarn (7 needles per inch). You need to remember that when you pick your yarn that the rougher it is the thinner it needs to be - it's better to use a smooth yarn.
 |
| Needles |
To use the needles you push/slide them out (towards you) by the metal circle sticks that you can see sticking out at the back of the machine.
 |
| Knitting Machine Carriage |
This is the Carriage of the knitting machine. It has a digital on it that you can see under the handle which controls the tension of the knitting (the bigger the number the looser it will be) and has a gap at the front of where you put the thread in. You move the carriage across the needles to knit.
-----------------------------------------------------------------------------------
STEPS.
1. You put your yarn on the floor and lead it around the back of thee table.
2. Thread up.
3. Put the carriage at the right of the machine if it's not already.
4. Put forward the needles you want to knit on - you can use as many needles as you like.
5. Wrap the end of the yarn around the clamp.
6. Go into the first gap of the needles and wrap it over the thread over the needle. (You want to end on the same side as the carriage when wrapping).
7. Get a comb and hook onto the top of the yarn then hang weights on the comb to stop the knitting from getting in the way of the carriage.
8. Make sure the needles you want to knit on are pushed all the way forward and the needles you aren't going to knit on are pushed all the way back.
9. Do the first two rows of the knitting lose. - the first two rows will be a little more difficult to do before you do the rest.
10. When you have done two rows give the comb a little wiggle to make sure all the yarn is neat and doesn't get caught in the carriage.
11. When you have done as much knitting as you wanted you will need to do a few rows that are tighter before you cast off.
12. Once you have finished and cast off you will need to pin your knitting down and steam it to make it flat as it will curl straight after knitting.
11. When you have done as much knitting as you wanted you will need to do a few rows that are tighter before you cast off.
12. Once you have finished and cast off you will need to pin your knitting down and steam it to make it flat as it will curl straight after knitting.
----------------------------------------------------------------------------------
THREADING UP | CASTING ON | CASTING OFF.
I found threading up, casting on and casting off a little difficult so I have found some videos on Youtube that show you how to do that. (These are not my videos\ I do not own any of the content).
I found threading up, casting on and casting off a little difficult so I have found some videos on Youtube that show you how to do that. (These are not my videos\ I do not own any of the content).
(This channel on Youtube has other videos about knitting machines and different methods of knitting: https://www.youtube.com/user/thefashioncourse/videos )
(I've noticed on this one that she misses out a step where you put the stitch onto the pins sticking up to keep the knitting straight and prevent it from stretching).
-----------------------------------------------------------------------------------
STEAMING.
When you have finished your knitting you pin it to a ironing broad and then steam it. The knitting will stay to the form you have pinned it to. You can play around with the steaming by pinning the knitting in unusual shape like I have to create something more interesting to look at.
-------------------------------------------------------------------------------------
Thank you for reading. I hope you enjoyed and that this was helpful or useful in any way. x
(This is just a workshop I did to learn how to use the machine and learn to knit just incase I wanted to apply textiles to my project).
Thank you for reading. I hope you enjoyed and that this was helpful or useful in any way. x
(This is just a workshop I did to learn how to use the machine and learn to knit just incase I wanted to apply textiles to my project).
-------------------------------------------------------------------------------------
Tweet me and like me here:
Twitter: https://twitter.com/VictoriaAnnee_?lang=en-gb
Facebook: https://www.facebook.com/VictoriaAnneDesigns/
Tweet me and like me here:
Twitter: https://twitter.com/VictoriaAnnee_?lang=en-gb
Facebook: https://www.facebook.com/VictoriaAnneDesigns/


No comments:
Post a Comment